A LitterLocker is a disposal system for cat waste. I’ve been using one for years and recently purchased their newest version; LitterLocker Design. This article reviews the LitterLocker system and its pros and cons.
What does a LitterLocker do?
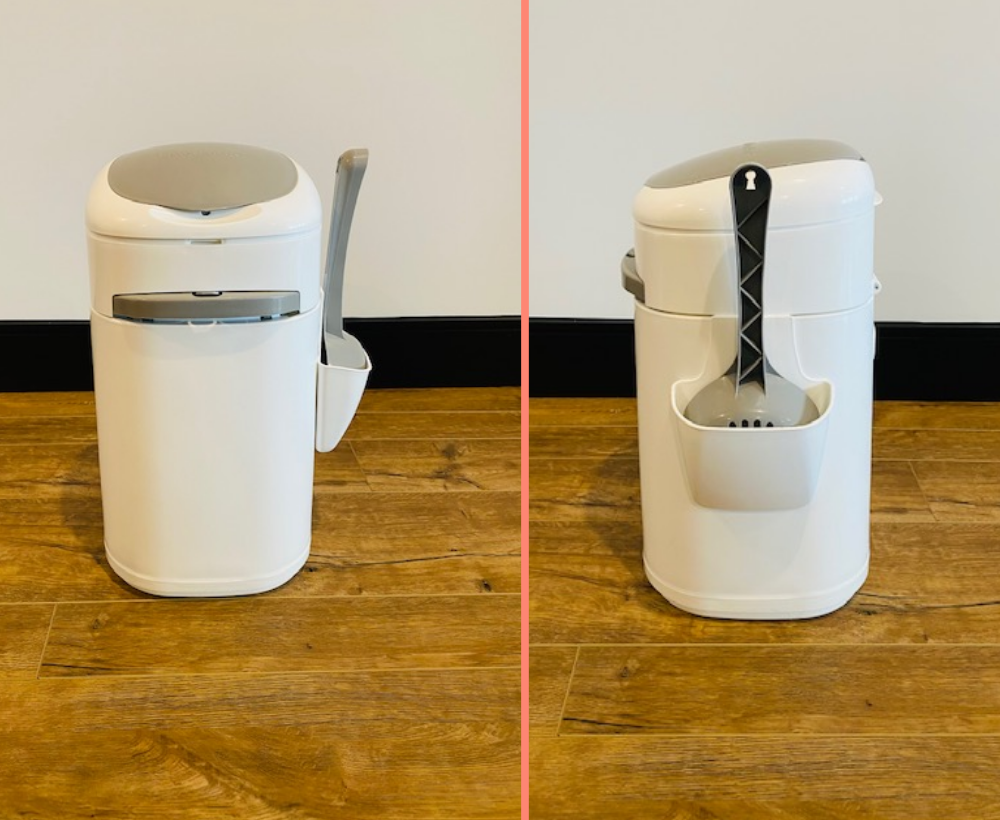
 A LitterLocker holds waste you scoop from the litter box and has a double closure system that traps odors.
The benefit of using a LitterLocker instead of a regular garbage can or plastic bag is that it allows you to go longer between trips to the outdoor trash can without smelling up the house.
The container has a lid that flips up so you can drop scooped litter into the top part of the container. You can then close the lid and pull back the lever, so waste drops into the lower part of the container.
The lever system works to seal the bag, so odors don’t escape when you open the lid or as the waste piles up in the bag.
A LitterLocker also looks nicer than a regular canister and plastic bag. If you go with the LitterLocker Design Plus, you can purchase fabric sleeves to spruce up the bottom part of the canister.
Does the LitterLocker really work?
Yes, the LitterLocker does work to trap odors and makes scooping litter easier. It works much better than a regular trash canister to keep smells in the container and reduce the number of trips required to an outdoor trash can.

LitterLocker Pros
Reduced odors
Before using a LitterLocker, I used a small garbage can and plastic grocery bags. Although the garbage can did have a lid, each time I lifted it, the smell of cat waste would waft out. You couldn’t use the same bag for more than a day or two.
To reduce smells (before a LitterLocker), I started using biodegradable pet waste bags, using a new bag each time I scooped, and would take the bag outside immediately.
Now, I use a LitterLocker and can go several days before having to take the bag out. I have two cats and three litter boxes and typically need to change the LitterLocker bag once a week.
Since adding another LitterLocker and a Litter Genie to our home, I don’t need to change the bags as frequently. Typically every 2 - 3 weeks.
Having a bag of cat waste in the home for 2 - 3 weeks would typically smell. But with the litter disposal systems, you can’t smell the waste inside.
Fast & easy to scoop
After all the research I’ve done for this blog, I came to realize I wasn’t scooping the litter box frequently enough. Now, we scoop the three litter boxes multiple times a day. The LitterLocker makes it faster and easier to scoop with the handy scoop, scoop holder, and simple system.
Before using a LitterLocker, I would grab a small bag, scoop the waste into it, tie the bag closed, and take it to the outdoor trash can. No wonder I was skimping on litter box cleaning.
Now, I just lift a lid, scoop litter clumps, and pull a lever. I scoop at least twice a day but only need to take a litter-filled bag to the outdoor trash can once a week.
When it’s easy to clean the litter box, you’re more likely to do it the proper number of times each day. And cats deserve that.
LitterLocker Cons
Design flaw
I own the LitterLocker ii, LitterLocker Design, and Litter Genie. I find there’s a slight flaw with the design of the LitterLocker Design. When you pull the lever out to allow the waste to fall to the bottom of the canister, it “unlocks” the top part of the canister that flips back and the top section lifts. I must then press it back into place and release the lever.
However, I find with all brands/styles I need to hold onto the canister with one hand while pulling on the lever with the other. Otherwise, it’s hard to pull the lever fully open and the canister will slide around; the canisters aren’t heavy enough to stay in place.
So regardless of which type of disposal system I’m using, I press down on the closed lid with one hand and pull the lever back with the other.
With the LitterLocker, pressing down while pulling the lever prevents the top half of the canister from popping up.
Cost
A LitterLocker is more expensive than a regular trash can and garbage bags. The refills are also more expensive than buying small kitchen garbage bags or rolls of pet waste bags.
However, you can find non-brand name refills, which are cheaper than the LitterLocker refills.
Waste
I wish the LitterLocker refills were more environmentally friendly. It would be a big plus if the plastic bags and cartridges were biodegradable. Better yet, if the canister was made with recycled plastic.
However, you can recycle the refill cartridge and the packaging of the refill is made of 50% recycled plastic, which is a plus.
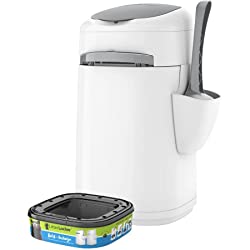
What is the difference between LitterLocker and LitterLocker Plus?
The only difference between the LitterLocker and LitterLocker Design Plus is the color. The LitterLocker is white with a grey lid, lever, and scoop. The Litter Locker Design Plus is all white.
The purpose of the Design Plus is for you to decorate the canister with fabric sleeves, which sell separately. However, the regular and plus are both the same size, so there’s no reason you can’t place a decorative fabric sleeve over the regular canister.
Buy LitterLocker in Canada
You can purchase the LitterLocker in over 20 countries, but it is mainly sold and distributed in Canada.
If you’re in Canada, you can purchase the LitterLocker here:
If you’re in the USA, you can purchase a Litter Genie here, which is a similar system made and distributed in the USA (LitterLocker is Litter Genie’s Canadian counterpart).
How do you use a cat LitterLocker?
To use a LitterLocker, you must first add the refill and set up the bag. Here’s how to set up, use, and change the LitterLocker system.
How to Set Up a LitterLocker
- Pull the tab on the bag cartridge to expose the blue bag inside.
- Find the end of the plastic in the refill container and pull out about a foot of plastic.
- Drop the plastic through the refill’s center and tie a knot at the end of the plastic.
- Place the refill container in the top of the canister.
- Pull the lever back and push the plastic bag into the bottom part of the container.
- Flip the top part of the container back so you can pull on the plastic bag, so the knot sits on the bottom of the canister when the lid is closed.
To Scoop
- Scoop each litter box 1 - 2 times per day.
- Lift the round lid of the LitterLocker and drop waste into the top part of the canister.
- Close the lid.
- Press down on the lid with one hand while pulling the lever back with the other, so the waste drops into the bottom compartment of the canister.
- Gently shake the LitterLocker while holding the lever back if all the waste doesn’t drop on its own.
- Release the lever to seal the bag temporarily and trap odors in the bag and canister.
To Empty
- When the bottom half of the canister is full, it’s time to remove the bag.
- Pull out the lever to unlock the top half and flip it back to gain access to the bottom.
- Pull on the top of the bag, so you have enough plastic above the waste to be able to tie a knot to close the bag.
- Use the built-in cutter by feeding the plastic through it.
- Tie a tight knot in the top of the bag and take the bag to your trash can.
- Tie a knot at the bottom of the plastic coming from the refill.
- Pull the plastic to feed more from the refill into the bottom part of the canister.
- Flip the top of the canister back.
How do you put together a LitterLocker?
When you receive your LitterLocker, it will require the following 8 steps to put it together:
- Remove the cardboard sleeve, then pull back on the lever while lifting and tilting the top half of the canister back. Inside, you’ll find a refill cartridge, scoop, and scoop holder. Remove everything from the canister.
- Hook the scooper holder onto the side of the canister and place the scoop in it. You can choose which side you want the scoop to sit on.
- Peel the tab on the refill container to expose the plastic inside. Find the end of the plastic and slowly pull the plastic out until you have a couple of inches exposed evenly around the entire refill. (see video below for steps 3 - 8)
- Once you have the end of the plastic exposed around all four sides of the refill container, pull the plastic out, so you have about one foot of plastic and feed the plastic through the center of the refill and pull down. Tie a knot in the plastic.
- There are 3 sections of the canister; the lid with a flip top, the lever section that hinges back to open, and the bottom canister. Remove the lid by pulling up on the lip at the back of the canister.
- Set the refill in the top of the lever section and pull the lever back so you can push the knotted plastic into the bottom canister.
- While still pulling back on the lever, tilt the lever section back. Pull the plastic so the knot will sit on the bottom of the canister when the container is closed.
- Flip the lever section back into place and snap the lid section back on.